Add Sales Orders to the Picking Slip Browser Process [How To]

Last Updated on December 13, 2022 by Tatyana Vandich
Lately, we have been giving our readers a special glimpse into erpWizard, Namtek’s fully integrated business software suite in the cloud. We’d like to continue this by showing you how to process Open Sales Orders by adding them to the Picking Slip Browser. To begin, the user will need to select Sales Order Processing from the menu, which is found in the Sales & Distribution menu unders Sales Processing, Entries & Processing.
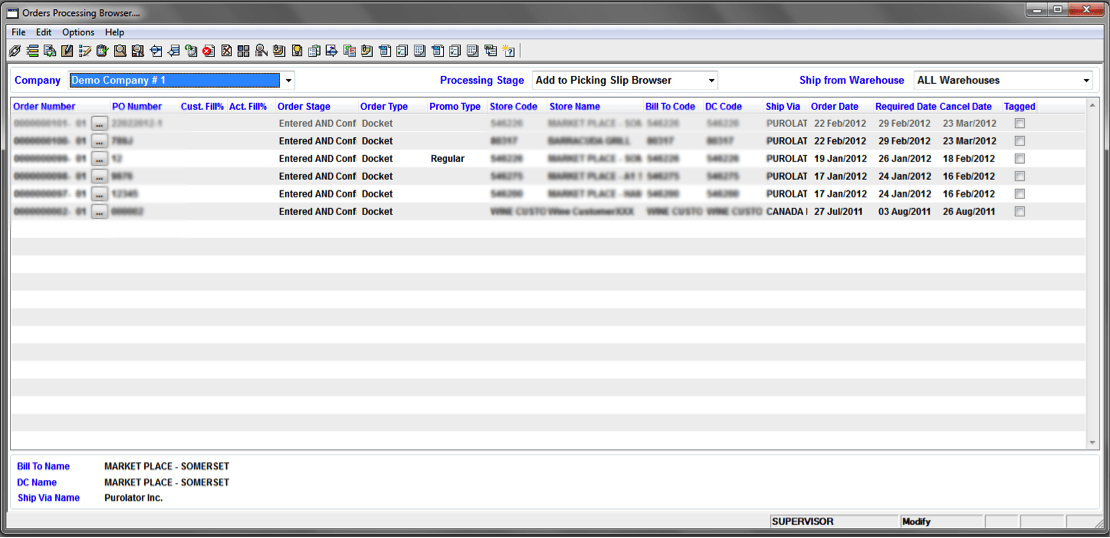
- Select the Company from the dropdown list.
- Select “Add to Picking Slip Browser” as the Processing Stage from the dropdown list (default).
- Select the Ship from Warehouse from the dropdown list.
Right-click on an order in the grid to see the following menu:
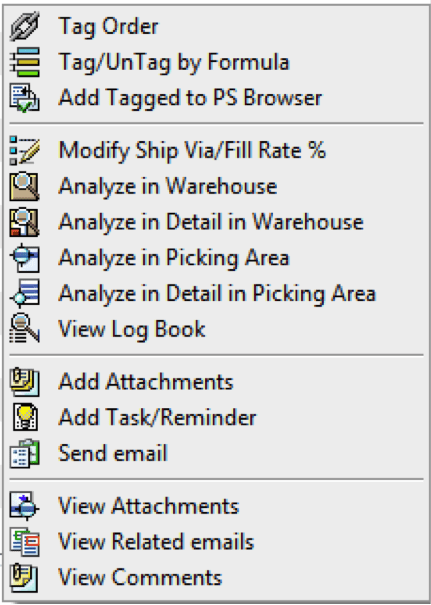
- Tag Order: This option is used to Tag a Sales Order to be processed. Please note that if the order is already tagged, then this option will say UnTag.
- Tag/UnTag by Formula: This option allows you to tag or untag multiple orders at once.
- Add Tagged to PS Browser: This option will add the tagged orders to the Picking Slip Browser.
- Modify Ship Via/Fill Rate%: This feature allows you to change the Ship Via or the required Fill Rate of the selected Sales Order.
- Analyze in Warehouse: This feature will check the stock availability of the ordered items in the whole warehouse and return the calculated filling rate for the order.
- Analyze in Detail in Warehouse: This feature will do the same as the Analyze in Warehouse, only it will print a detailed report with the items ordered and indicated the filling rate of each item.
- Analyze in Picking Area: This feature will check the stock availability of the ordered items in the Picking Area only, and return the calculated filling rate for the order.
- Analyze in Detail in Picking Area: This feature will do the same as the Analyze in Picking Area, only it will print a detailed report with the items ordered and indicated the filling rate of each item based on what is available in the picking area only.
- View Log Book: The log book is the history of the order. It indicates when the order was added and/or removed from the picking slip process.
Tag/UnTag by Formula
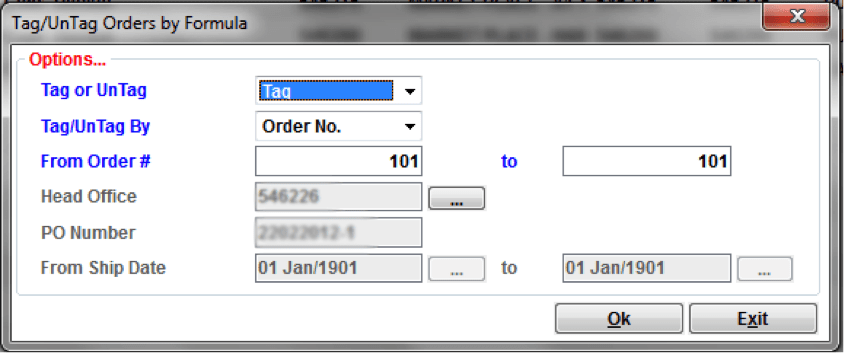
- Select the Tag or UnTag option from the dropdown menu.
- Select the Tag/UnTag By option from the dropdown menu.
- By Order No.
- Enter the From Order # to Order #
- Head Office
- Enter the Header Office Code
- Enter the PO Number.
- By Order No.
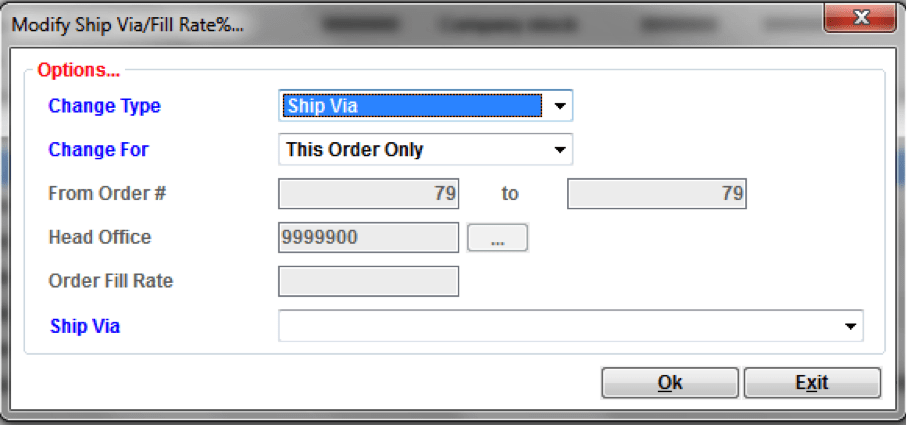
Modify Ship Via/Fill Rate %
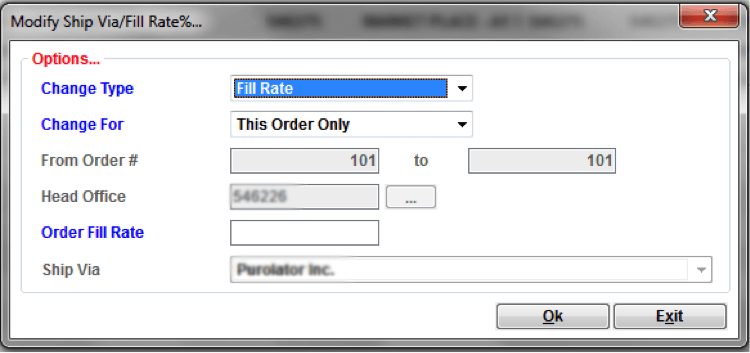
- Select the Change Type from the dropdown menu.
- Select the Change For option from the dropdown menu.
- This Order Only
- Enter the Order Fill Rate if the Fill Rate option was selected.
- Select the Ship Via from the dropdown list if the Ship Via option was selected.
- Range of Orders
- Enter the From Order # to Order #.
- Enter the Header Office Code
- This Order Only
The ‘Add to Picking Slip’ Process
The ‘Add to Picking Slip’ process is done with an SQL Procedure. Here are the steps that this procedure follows when adding an order:
- Run the credit check if the “Skip Credit Check” flag is False.
- If the Credit Check is Ok then continue
- If the Credit Check fails then a message will be issued and the order will NOT be added to the Picking Slip Process
- Check to make sure that all of the SKUs on the order have an assigned Picking Bin Location
- If all SKUs have assigned picking locations then continue
- If there is at least one SKU with NO assigned picking location then a message will be issued and the order will NOT be added to the Picking Slip Process
- Check the inventory availability
- If there is enough stock to meet the order filling percentage then continue (Please see below for a detailed explanation on how the Available Stock is calculated)
- If there isn’t enough stock to fill the order then a message will be issued and the order will NOT be added to the Picking Slip Process
- Distribute the order into boxes based on the setup at the Customer Level
- Change the stage of the order and add a record in the log book that the order was added to the Picking Slip Process
Order Stock Availability
- Get the list of SKUs from the Sales Order
- Get the Quantity on Hand based on the Ship from Warehouse Country and the Ship to Country of the Sales Order
- First get the inventory where the Destination Market = Ship to Country
- Second get the inventory where the Destination Market <> Ship to Country
- Compute the On Hold Quantity (Sales Orders at Stage ‘1’ that have the hold quantities flag set as True).
- Compute the Reserved Quantity (Sales Orders at Stage ‘2’ or ‘3’)
- Compute the Available Quantity (Available Quantity = Quantity On Hand – Quantity On Hold – Quantity Reserved)
- Compute the Ship Quantity
- If Available Quantity < Quantity Ordered, then Quantity Shipped = Available Quantity
- If Available Quantity > Quantity Ordered, then Quantity Shipped = Quantity Ordered
Picking Slip Browser
The next step in processing the Open Sales Orders, is to print picking slips.
To begin, select Sales Order Processing from the menu. This can be found in the Sales and Distribution menu under Sales Processing, Entries and Processing.
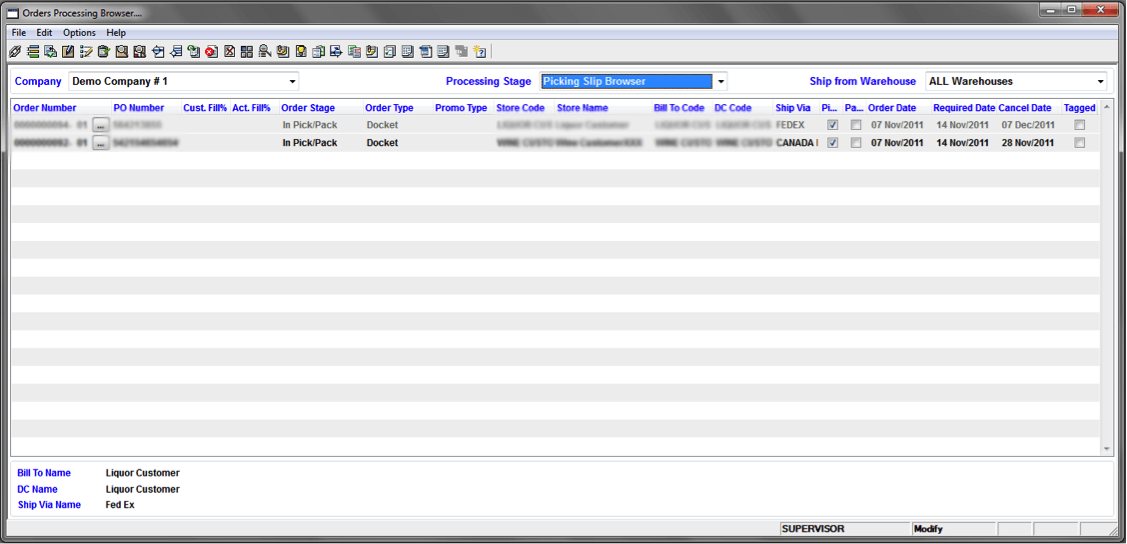
- Select the Company from the dropdown list.
- Select “Picking Slip Browser” as the Processing Stage from the dropdown list.
- Select the Ship from Warehouse from the dropdown list.
Right-click on an order in the grid to see the following menu:
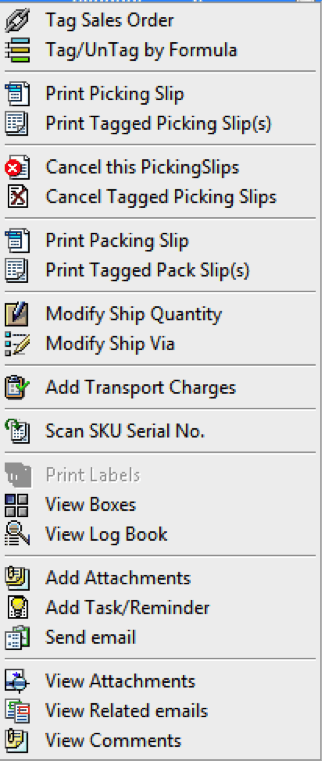
- Tag Sales Order: This option is used to Tag a Sales Order to be processed. Please note that if the order is already tagged, then this option will say UnTag. Tagging and Untagging of the sales orders can also be done by pressing the Enter key, or by clicking the check-box.
- Tag/UnTag by Formula: This option allows you to tag or untag multiple orders at once.
- Print Picking Slip: This option will print the Picking Slip for the selected sales order. Please note that this option will say Re-Print if the Picking Slip has already been printed.
- Print Tagged Picking Slip(s): This option will add the print the Picking Slips for the tagged sales orders.
- Cancel this Picking Slip: This option will cancel the Picking Slip for the selected sales order and the order will return back to the “Add to Picking Slip” process.
- Cancel Tagged Picking Slip(s): This option will cancel the Picking Slips for the tagged sales orders and return them back to the “Add to Picking Slip” process.
- Print Packing Slip: This option will print the Packing Slip for the selected sales order. Please note that this option will say Re-Print if the Packing Slip has already been printed.
- Print Tagged Packing Slip(s): This option will print the Packing Slips for the tagged sales orders.
- Modify Ship Quantity: This feature allows you to change the Quantities to be shipped of the selected Sales Order.
- Modify Ship Via: This feature allows you to change the Ship Via of the selected Sales Order.
- Add Transport Charges: This feature allows you to add the Transport Charges to the selected Sales Order.
- Scan SKU Serial Number: This feature allows you to scan the serial numbers for each of the SKUs being shipped for the selected sales order.
- Print Labels: This option allows you to print the MH10 Labels for the selected sales order. This option will only be enabled for sales orders belonging to customers who have the MH10 Labels setup in their profile.
- View Boxes: This option allows you to see the SKUs per box of the selected sales order.
- View Log Book: The log book is the history of the order. It indicates when the order was added and/or removed from the picking slip process.
Modify Ship Quantity
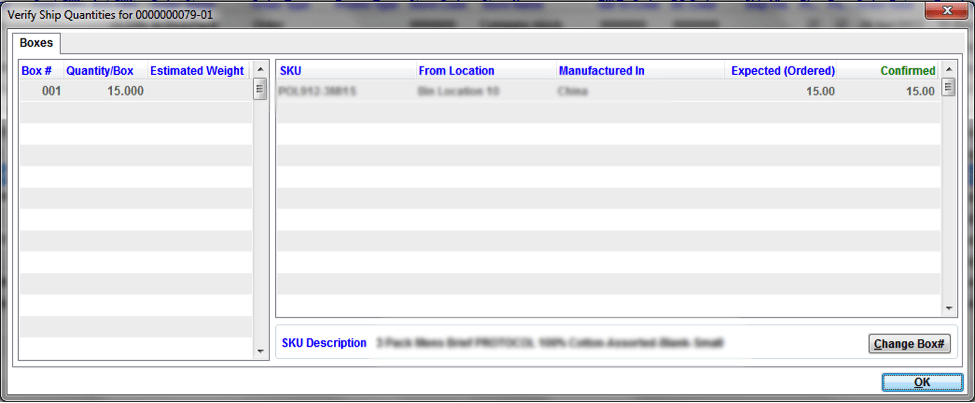
- Change the Confirmed (shipping) Quantity.
- Click in the Change Box # button to move the SKU to a different box.
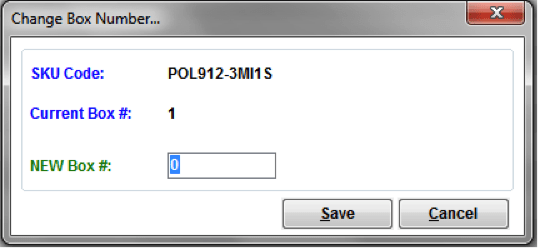
- Enter the NEW Box #.
- Click the Save button to record the changes.
- Click the OK button to close the screen. Please note that changes are done on a real-time basis, which is why there is no Save button.
Modify Ship Via
- The Change Type is NOT modifiable on the Fill Rate (can’t be changed at this point in the process).
- Select the Change For option from the dropdown menu.
- This Order Only
- Select the Ship Via from the dropdown list.
- The Order Fill Rate is disabled on this screen.
- Range of Orders
- Enter the From Order# to Order #.
- Enter the Header Office Code, or press F5 or the button to select the Head Office from a list.
- This Order Only
Add Transport Charges
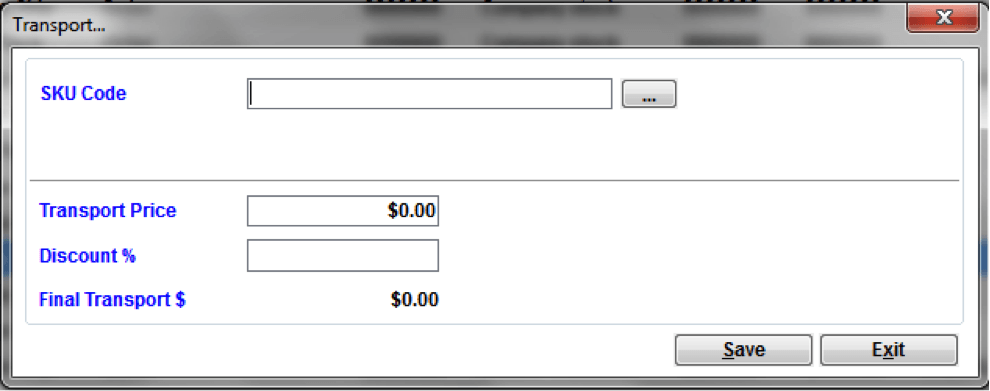
- Enter the SKU Code, Transport Price and Discount % (if there is a discount).
- The Final Transport $ to be added to the order will be calculated.
Scan SKU Serial Numbers
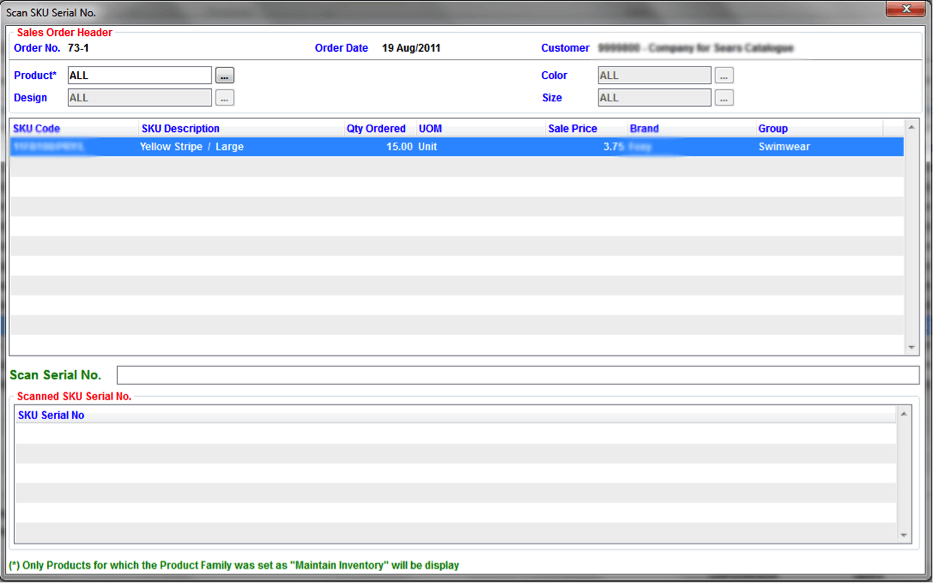
- Select SKU Code
- Use a scanner to scan the Serial No. or manually type it in.
Hopefully, after going through this detailed description of Namtek’s ERP software solution, you can see how easy and efficient it is to add sales orders to the picking slip browser using erpWizard. All our sections are just as simple and have all the necessary features you need to run your business. To view the full software suite, click on the button below.


Leave a Reply
Want to join the discussion?Feel free to contribute!